Intro
In this blog post, I will explain how to create a NetStorage (NS) Group, how to upload content to NetStorage using FileZilla and how to create a simple Akamai Delivery Property.
What’s Hot?
Have you checked the previous Your Application at the Edge [S01E01] blog post? If you are curious about the reason why the series exist, then go and have a look at the first blog post.
Context
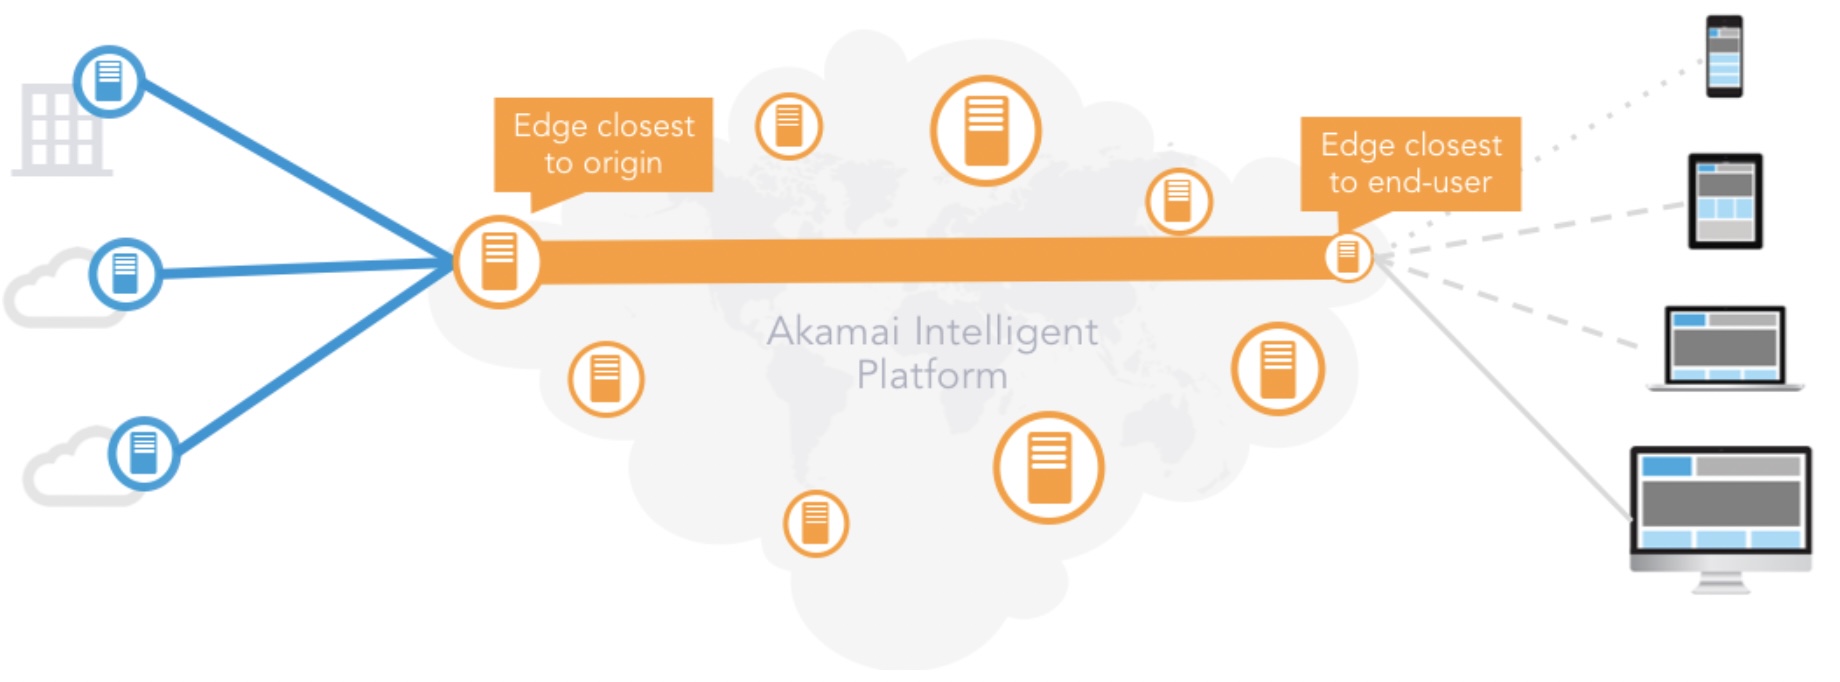
Before we crack on with the NS implementation I would like to give a high-level overview of the scenario. Figure 1 shows the architecture in which we have the origins (on the left-hand side), the Akamai Edge Platform (in the middle), and the end-users (on the right-hand side).
 |
|---|
| Figure 1: High-level Architecture Overview. |
In the current scenario NS will be our origin (see Figure 2). NS is a managed product that provides persistent, replicated storage of content, including images, streaming media files, software, documents, and other digital objects. By mirroring content to a small number of core network locations, content is highly available and easily accessible to the Akamai Edge servers.
 |
|---|
| Figure 2: NetStorage Positioning. |
In this article, we will focus on exploring and deploying NS highlighted in purple – Step 1. The Ion Delivery piece will be covered in the next episode.
Requirements
Before I explain how to create an NS group and how to upload content to it, it’s important to ensure you have access to Luna Control Centre. So make sure you have an account.
There are multiple ways to upload content to NS. It supports the use of various protocols and services such as FTP, Rsync, HTTP and SSH-based services. We will be using SSH File Transfer Protocol (SFTP) so make sure you generate a new SSH Key Pair.
You will also have to install an SFTP client. Some examples are FileZilla, OpenSSH, PuTTY, and WinSCP. I will be using FileZilla for this blog post.
Creating a New NS Group
- Login into Akamai Control Centre using your credentials
- Go to the top left-hand drop-down menu and select NetStorage from the Core Services
- Add a new NetStorage group
- Add a Storage Group name and Domain Name (for both cases I’ve used: jc-website-origin)
- Add to Replicas (for example europe and global)
- Create a CP Code and add an Upload Directory
- (Optional) You can configure the Automatic Purge Settings
- Please review the details of your NS configuration in the Summary section and click next
Once you have done all the steps above you will have to wait until the propagation has finished.
Generating a New SSH Key
In my case the command line is as follows:
~ sudo ssh-keygen -t rsa -b 2048 -E md5 -C "jc-website-2018-12-14" -f ~/.ssh/jc-website- keys/jc-website-2018-12-14
Where:
- The -f option specifies the file name to which your private key will be saved. Without this option, it is stored by default in your home directory under .ssh/identity.
- The -C is a comment field. Akamai recommends you put your username, the date the key was created, and an indicator of the key type as the comment.
- The -b option tells how many bits to use in the key. For NS, SSH-2 RSA keys must be 2048 bits or less.
- The -t option tells which type of key to be generated. RSA is preferred. (If invoked without any arguments, ssh-keygen will generate an RSA key for use in SSH protocol 2 connections.)
- The -E md5 tells ssh-keygen to use the md5 hash function, instead of SHA256.
Creating an Upload Account
The next step is to create an upload account and choose SSH as the access method for uploading and accessing the NS group jc-website-origin. For that you have to follow the next steps:
- Go to Upload Account on the left side menu and click on Add an Upload Account
- Add you Upload Account Detail: Name, Email Address, Contact number, etc.
- Choose your Upload Directory Association. This is the NS group created before. In my case is jc-website-origin. Because I want to have access to the whole NS group I won’t be adding any directory limits;
- Because we are going to use SSH, please select the “SSH And Aspera” option and copy-paste your public key created in the section above. Add the SSH key and click next.
- The Advanced Settings allow you to select pre-defined Access Control List (ACL) Rule Sets for using with the Upload Account. I won’t be using it in this case.
- In the Summary, you can check the details of your Upload Account. Please double-check them and click Create. If you need to modify the details of the upload account you can always edit your upload account later.
Upload Content to NetStorage
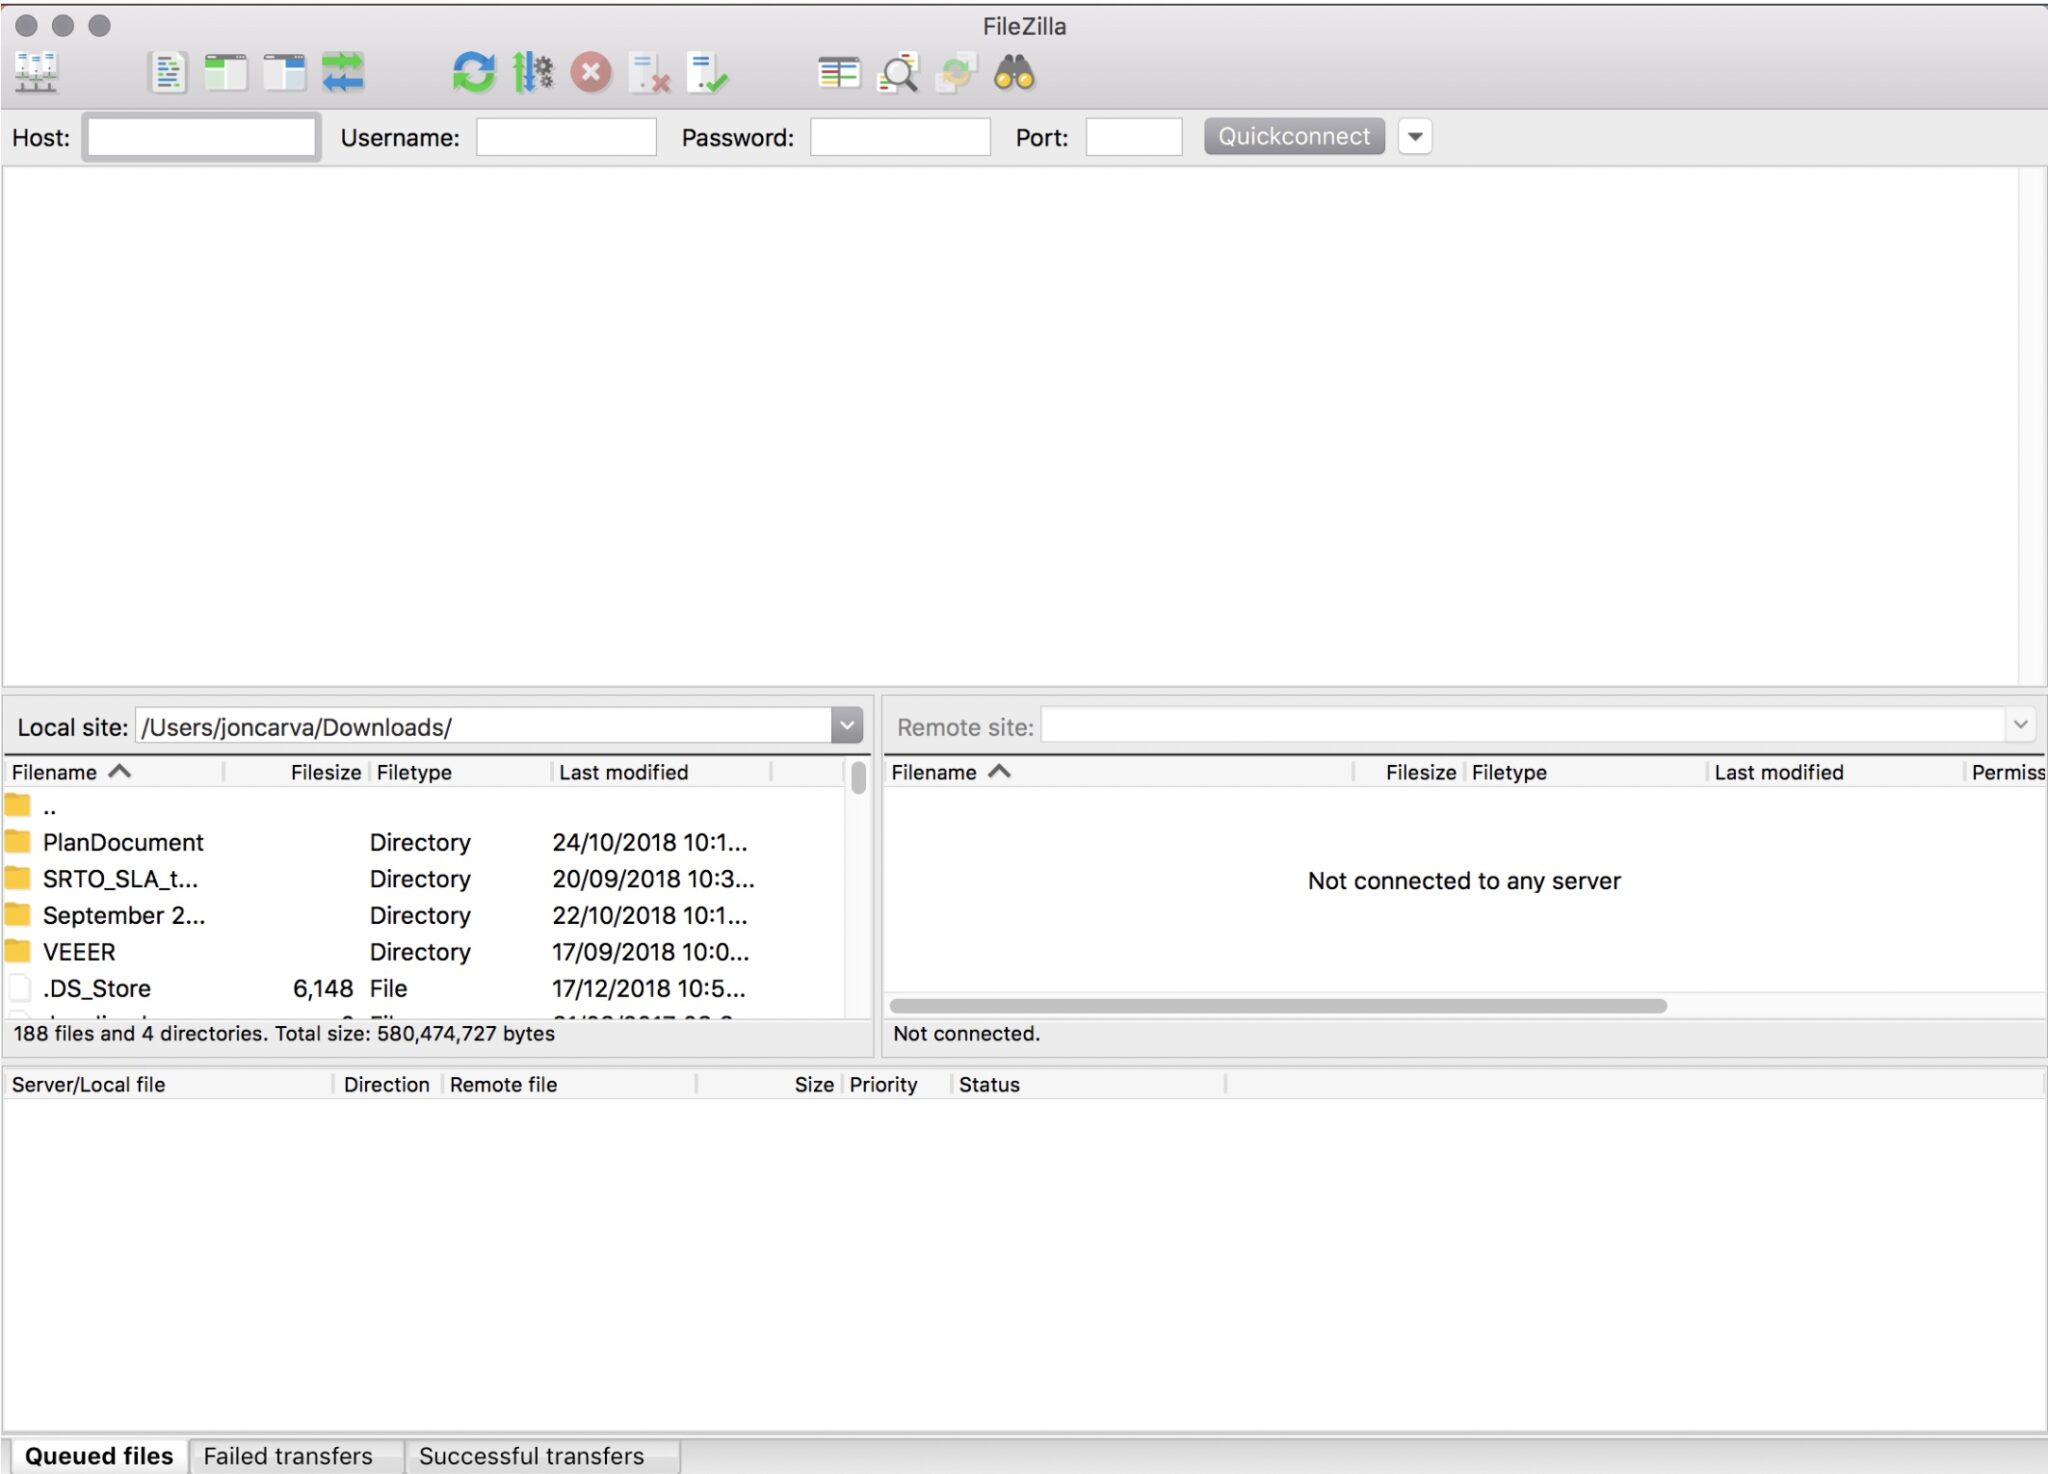
In this section, I am going to describe the process of uploading content to NS using FileZilla v3.39.0.
 |
|---|
| Figure 3: FileZilla App. |
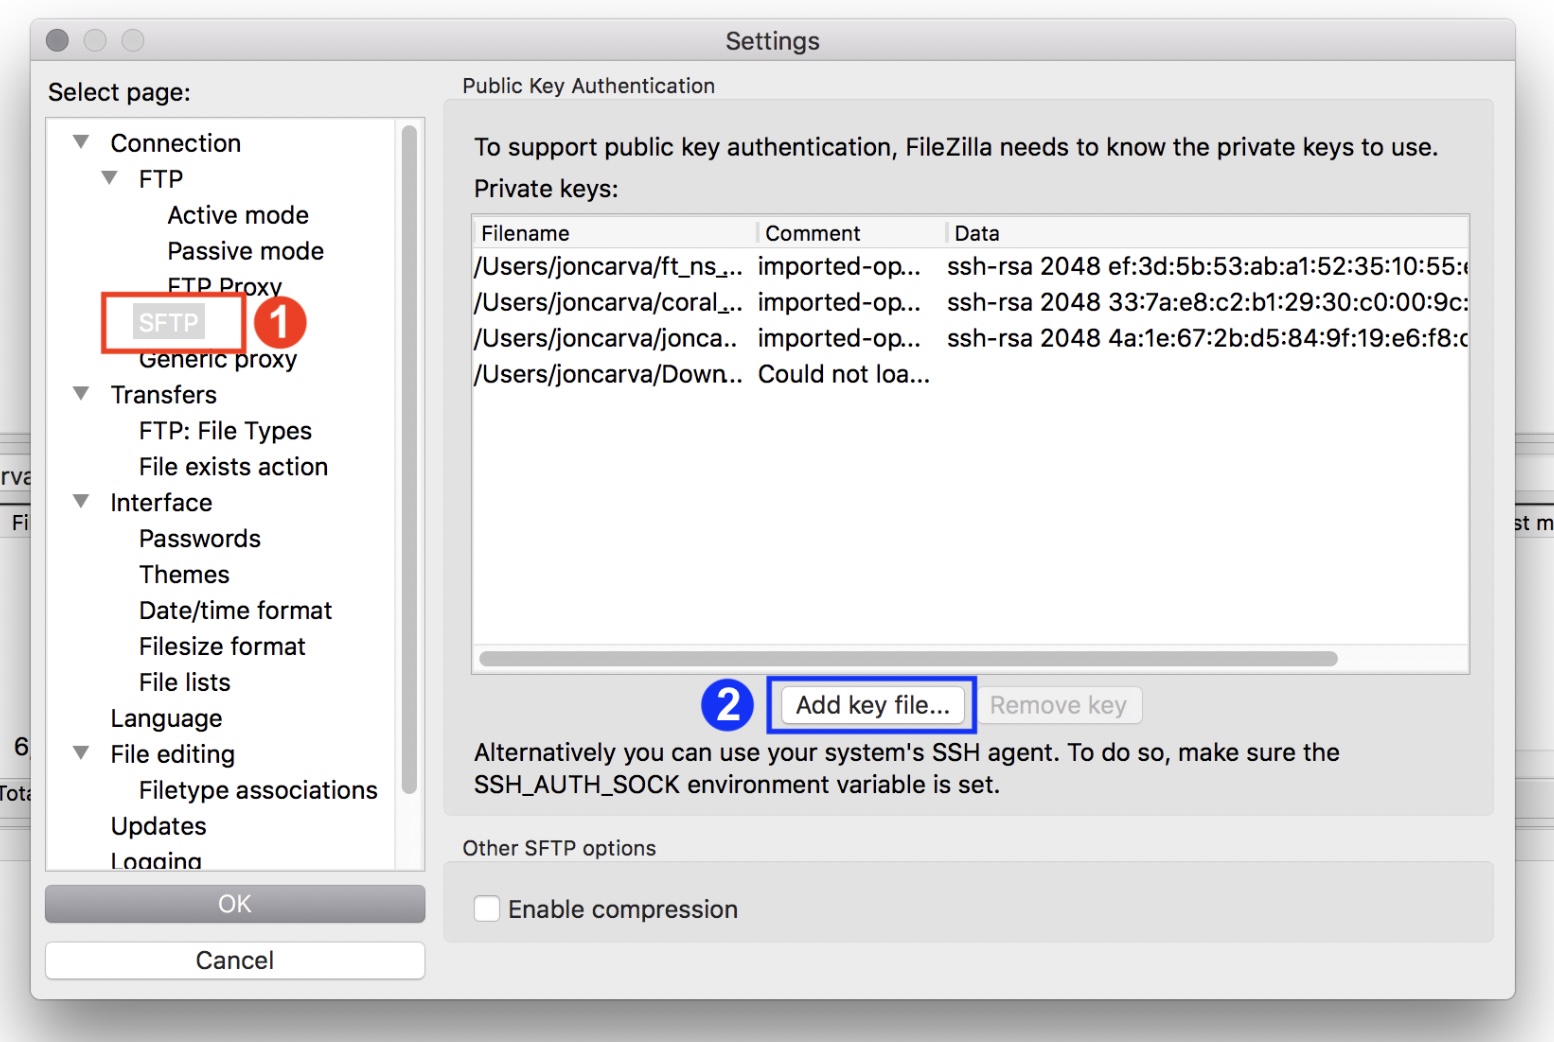
To support public key authentication, FileZilla needs to know the private key to use. So, the first step is to add the SSH key that we had created in the section Generating a New SSH Key. For that go to Setting under the Edit option. Under the “Connection”, go to “SFTP”, click on “Add key file…”, and select the private key from the folder where you have saved the SSH private key.
 |
|---|
| Figure 4: Adding an SSH Key to FileZilla. |
You will be prompted with a message for converting the key into a supported format. Click “Yes”, and type your password and a new file name for the file key.
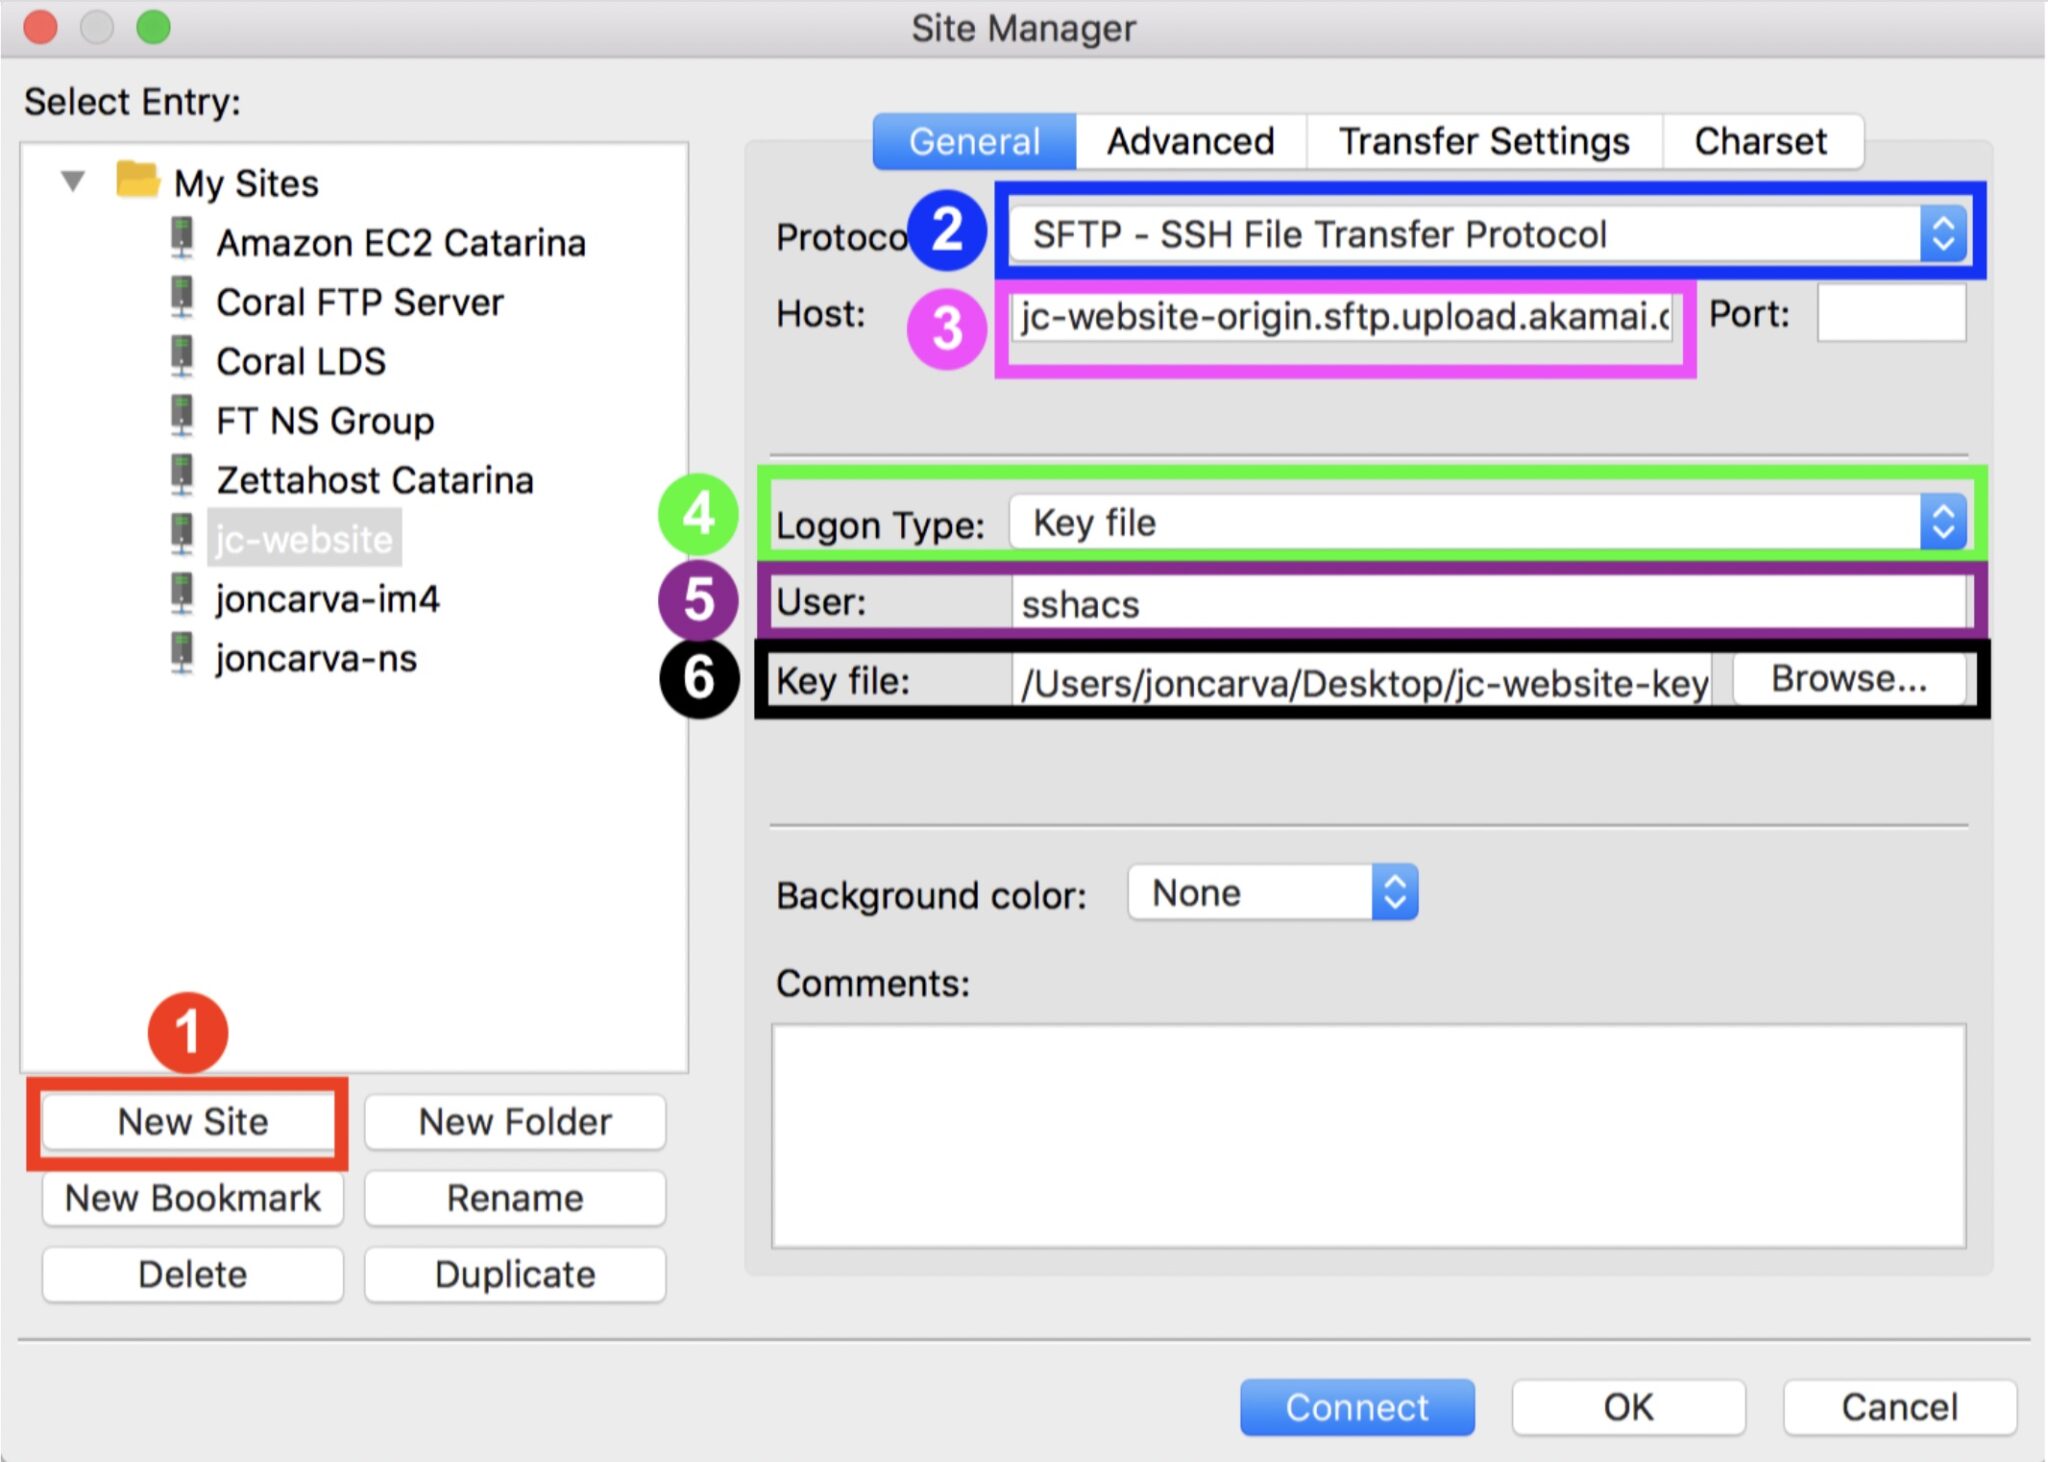
Once you have done this, the next step is to add a new Site. You can do this by going to the Site Manager ad adding a new Site – see Figure 5.
- Choose SFTP as the protocol to be used when connecting to the server: 2. Type the NS upload Hostname;
- Use the Key file as the Logon Type;
- Type the user name – sshacs;
- Choose the Private Key File (.ppk file type).
 |
|---|
| Figure 5: Adding a New Site to FileZilla. |
You will be prompted with a message to add the server password and to trust the host.
Now you should be able to upload the content of the Website to your NS group. You can drag and drop the content of your Website directly to the folder “/[CP Code]”. In my case, I’ve copied the content to the /804066 directory.
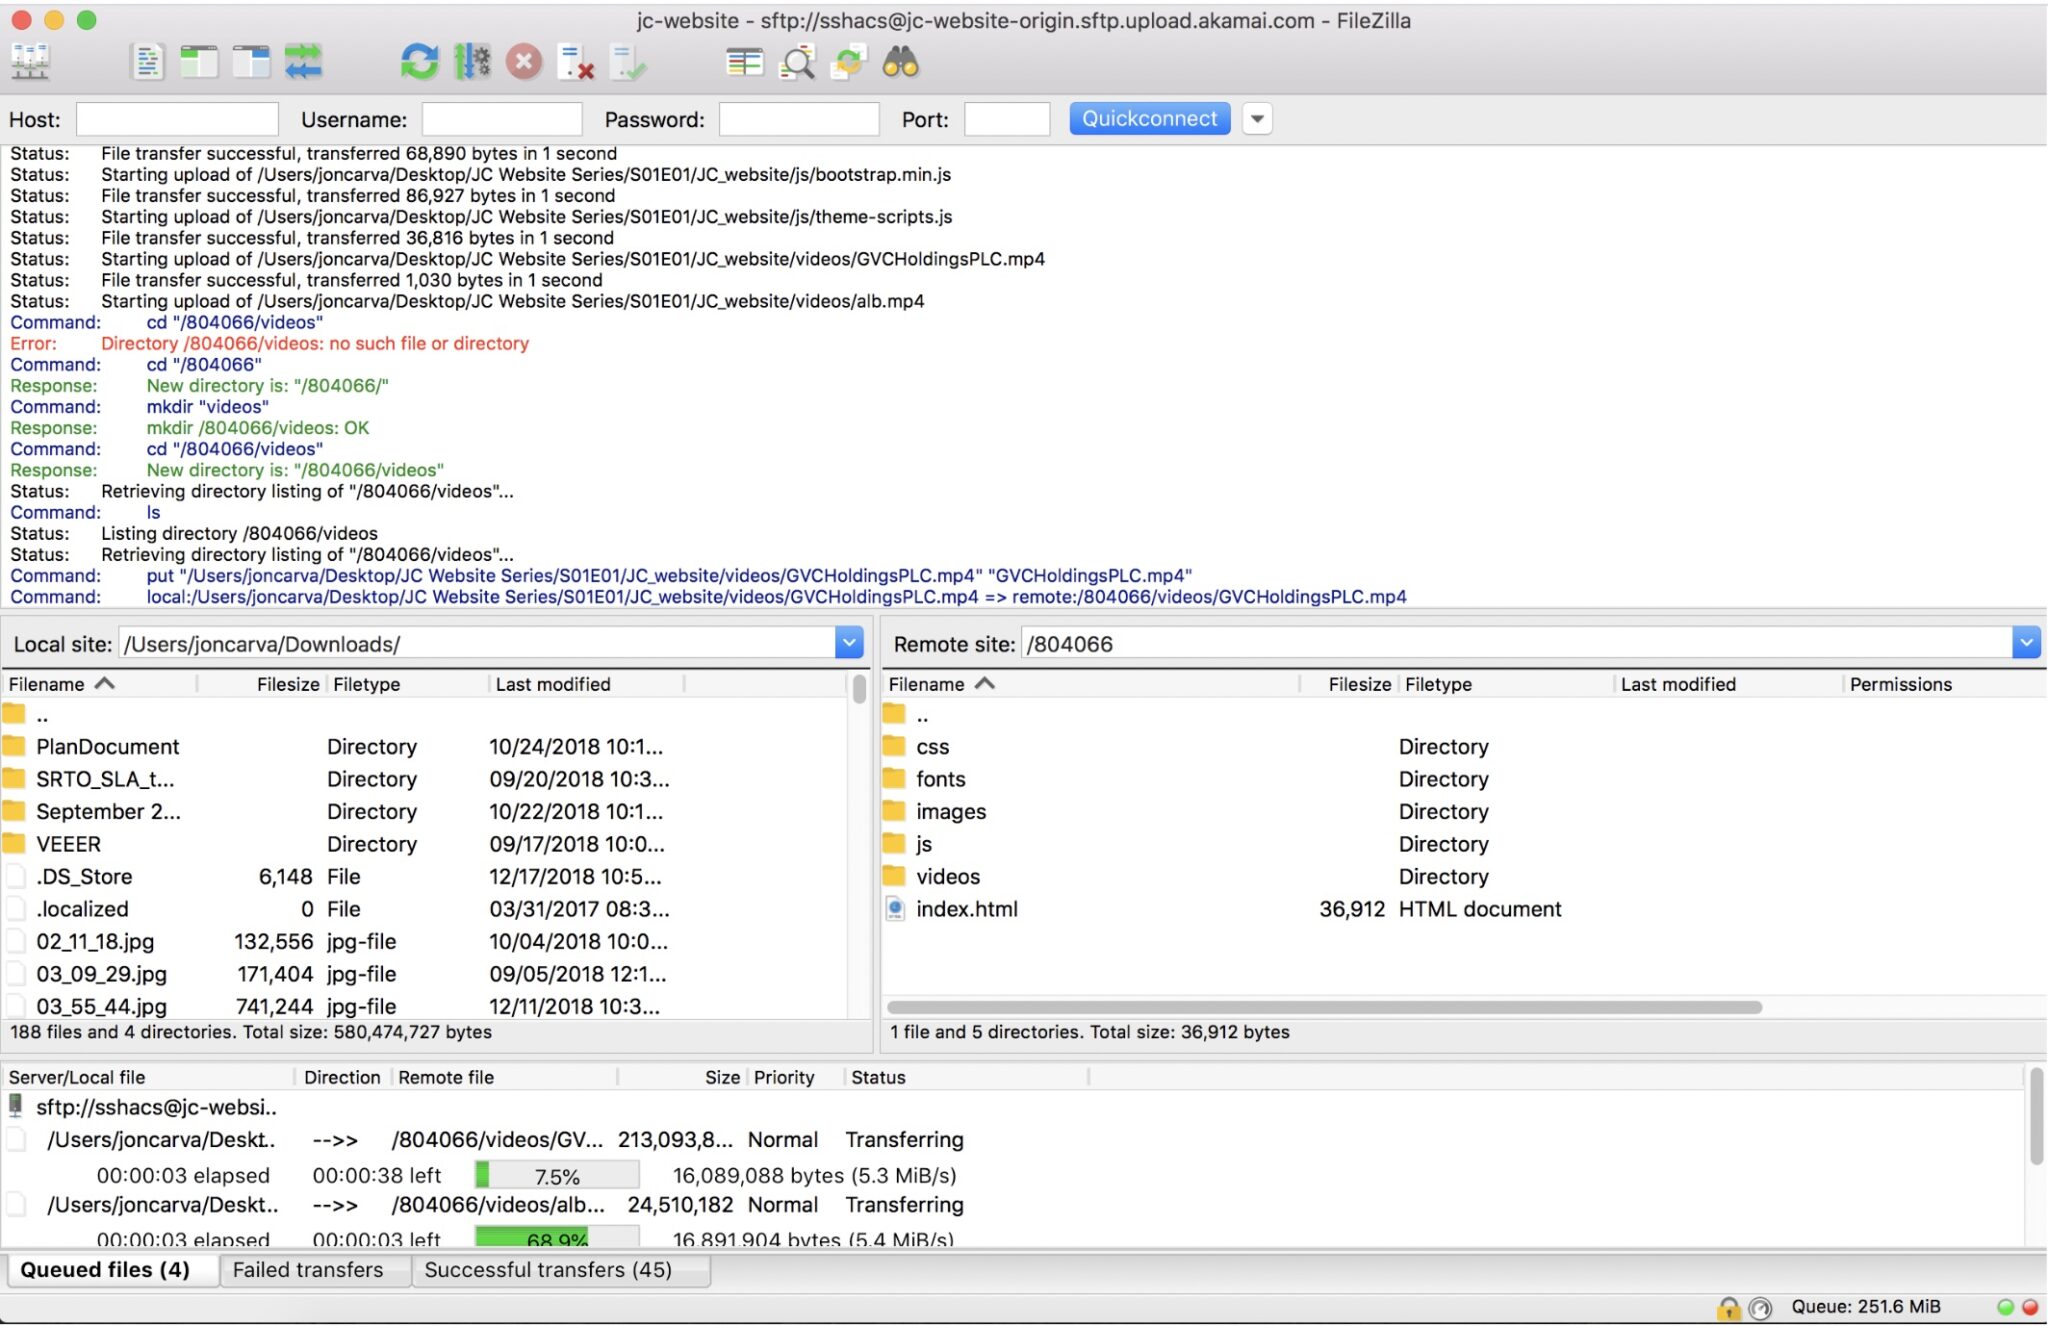 |
|---|
| Figure 5: Uploading the Website content to the NS group. |
You can double-check if your content has been uploaded correctly to the NS group by using the Monitoring tool available in Akamai Control Centre.
Summary
The process of configuring and uploading content to NS is pretty easy and straightforward. Once you’ve uploaded content to the NS group, the content will be replicated across the different replicas and geographies which will give you content replication and avoid downtime in case one of the NS groups is down or inaccessible.
What’s next?
In the next blog post S01E03, I will explore the Property Manager and how to configure a Delivery Property for making use of the CDN capabilities such as caching, content compression, prefetching, and others.